
If you wish to keep track of the fact that you made a telephone claim for overdue items, select one of the subscriptions and choose the icon on the Modify receipt screen. The system displays the Claim by phone form:
Last claim date – display only. Last date claimed by telephone.
Last contact person – display only. Contact person at supplier that received the telephone claim.
Last remarks – display only. Remarks entered by person who made the telephone claim.
Claim date – defaults to today's date. If you are recording a telephone claim, enter a date here.
Contact person – if you are recording a telephone claim, enter the person that you called.
Remarks – if you are recording a telephone claim, enter any special information that the contact person told you.
Press to create a new telephone claim. Press to leave the form without creating another claim. If you choose the icon for a subscription that is already claimed by phone, the system fills in the first three fields with the information entered into the previous telephone claim.
If the “Print label” field for a subscription is set, then the library will have the ability to automatically print labels for serials on receiving serial parts. In addition a manual reprint of the labels is available from the “Modify issues” display. See the help on AFO 354 for background information.
[PL*] – Select one of the subscriptions and click on this option to print a label. The label will be generated according to parameters set in AFO 367 – Miscellaneous as well as the settings for your port in AFO 612.
If there are left over labels to be printed you will be warned when exiting AFO 311:

When you use the option from the Receiving screen to insert a new issue, the system displays the Insert an issue form. The fields default to the values from the line you specified when you used the insert option. Thus, if you inserted above the issue on line 7, the system copies the values from the fields for line 7, and reproduces them on a new form.

Numbering - Contains issue enumeration (volume numbering) and issue chronology (cover date). This information is defaulted to the values from the line you specified when you used the insert option. You can override this information by entering your own numbering into the columns. One column displays for each level of enumeration and chronology defined in this issue's publication pattern. For chronology fields that have chronology codes with valid predictions (i.e. months, days of week, seasons), you can press F8 (or type in ?L) to see a list of valid entries. In this case, the system will verify that you enter a valid prediction in the field.
Instead of using F8 or ?L you can enter free text. In that case the system will NOT verify you have entered a valid prediction. You can use this for instance to add 'summer special' etc.
Issue title – special title associated with this part.
Suppress captions – if not checked, the system uses the captions defined in the publication pattern when printing out the Numbering of the issue. For example, v.61:no.12(2004:November). If checked, the captions are ignored and the system prints out what is in the numbering field. This is useful if you wish to receive an annual Index at the end of the year without creating a separate type of holding/publication pattern record for it. In this case, enter Index.2004 into the first column of the Numbering field, clear any other data out of the remaining columns and check the Suppress captions field. The system will display Index.2004 as the numbering for this part.
Annotation – enter a note about this part.
Note
You cannot insert an issue with copies expected in the future.
Subscription – subscription number. Not updateable.
Shelfmark – current shelfmark for the subscription. Not updateable.
Status (*) – To assign a status to a copy, enter a numeric Issue status code as previously described in section 311.3.2.1. You can also enter F8 (or type in ?L) in this field to open up the detailed Insert issue form which allows you to barcode the issue, enter public and staff notes, URL information, change the date, etc. Fields in which you can use F8 (or type in ?L) to open a detailed form are denoted by (*). Please refer to section 311.3.3.1 for a description of the detailed form.
Barcode – if this cell is grey in colour, you are not allowed to barcode issues for this subscription (i.e. subscription has no shelfmark or does not have Barcode issues field set). The display in the field is Yes or No to indicate whether the issue is barcoded for this subscription. Not updateable.
URL – if this cell is grey in colour, you are not allowed to enter URL information for this subscription (i.e. subscription's Format field is set to Print only). The display in the field is Yes or No to indicate whether the issue has URL information for this subscription. Not updateable.
Public note – The display in the field is Yes or No to indicate whether the issue has a public note for this subscription. Not updateable.
Staff note – The display in the field is Yes or No to indicate whether the issue has a staff note for this subscription. Not updateable.
Supplier – the missing issues supplier attached to the subscription. Not updateable.
Route – Whether or not the subscription is routed. Not updateable.
When you press , the system creates an entry for each of the subscriptions with a status other than No action in the Status column. If you have assigned barcodes to any of the received issues, the system now displays the Enter a new item form for each of these barcodes. Please refer to section 311.3.1.2. If any of the subscriptions you received are routed, the system will now either print out a routing slip immediately or send an entry to AFO 344 (dependent on the settings in your User default record – AFO 368). After the receipts have been registered, the system redisplays the Receiving screen with updated information.
When you press F8 (or type in ?L) in the Status column of the Insert issues form, the detailed Insert issue form displays.

Subscription – display only. The subscription number assigned to this subscription.
Shelfmark – display only. The shelfmark assigned to this subscription.
Status - assign a status to a copy. Enter a numeric Issue status code as previously described in section 311.3.2.1.
Status date – enter the date associated with the issue status.
Barcode – if the subscription has the Barcode issues flag set and if you barcode issues at time of receipt, enter the barcode here.
URL – if the subscription has a Format that supports receipt of electronic material, enter the URL here.
URL path – if the subscription has a Format that supports receipt of electronic material, enter the URL path here.
Public note – enter a public note that is specific to this copy of the issue.
Staff note – enter a staff note that is specific to this copy of the issue.
Supplier – display only. Missing issues supplier attached to the subscription.
Route – display only. If checked, the subscription is the routing copy.
Select one (or more) of the issues from the Receiving screen and choose the icon to delete information for the selected issue(s).You cannot delete the expected issues at the top of the screen. The system displays the message, Answer to go ahead and delete, or to not delete it. If you answer , the system checks to ensure that the parts can be deleted. If no errors are encountered, the system deletes the holdings for the current SHIPTO location from the selected parts record(s). If there are holdings for other SHIPTO locations in the parts record(s), the issue will continue to display but it will show a status of Not expected. This means that there are other holdings for this part on the system but they do not belong to the current SHIPTO location. If there are no other holdings for this part on the system, the entire line is deleted from the display. Use this option to remove an issue inserted in error or an unpublished issue. This delete option deletes receipt information from all of the subscriptions for the current SHIPTO location. If you wish to delete receipt information from one specific subscription only, use the option on the Receipt information screen after choosing the option on the Subscription general data screen (see section 321.3.4).
Note
Depending on parameter settings in AFO 367 – Miscellaneous, you may be prompted for an additional password when you try to delete more than 1 issue at the same time:
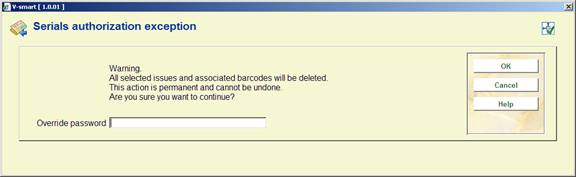
When issues are linked to citations, and these issues are selected for deletion, the system displays a warning. The message has three buttons:

Allows you to change the order of display of the issues on the Receiving screen. You cannot move an issue above the next expected issues. After selecting this option from the Receiving screen, the system prompts with the form.
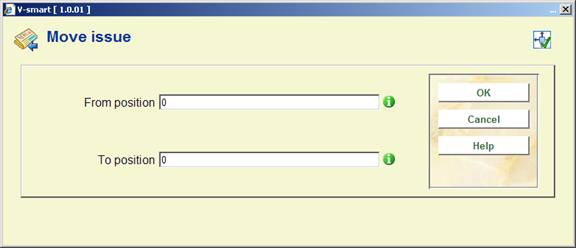
From position – enter the line position of the issue you want to move
To position – enter the line position that you want to issue to move to. If you move an issue upwards in the list, the To position equals the final position in the list. In our example, the issue formerly at line 11 will be moved to line 9. The issue formerly at line 9 will now display on line 10. If you move an issue downwards in the list, the issue will be moved to the position below that defined by the To position. For example, if you moved an issue from line 9 to line 11, the issue will display under the former contents of line 11.
Use the option to restrict what you see on the Receiving screen. The system displays the Filter by form.

Status – select one or more statuses. The system will show you only issues with these statuses.
Barcoded issues – if checked, the system will show only issues that have been barcoded.
Use the button to clear previous filtering restrictions. Press to return to the Receiving screen. The header portion of the Receiving screen will be updated with your new filter restrictions. Also, the system will display issue information according to your filter restrictions.
In the example, we have selected to display only claimed issues. After pressing , we return to the Receiving screen.

Notice that the header has been updated to let us know that we are only displaying Claimed issues. Only 31 out of 43 issues have the Claimed status.
Note
Filters remain in effect after you leave the Receiving screen. Use the button on the Filter by form to reset the filter.
From the Receiving screen, select a line that has the Barcoded column set to Yes and then choose the icon. The system displays the Item summary screen for the selected issue.

You are not allowed to add new barcodes, only update/delete barcodes that have already been created for the selected issue. If you wish to add a barcode to an issue, use the icon from the Receiving screen.
If you select the icon from the Receiving screen, the system displays the Holdings statement for shelfmark sets screen.

The system displays the summary holdings statement for each subscription at the current SHIPTO location.
Click one of the entries to update the holdings statement for one of the subscriptions. The system responds by displaying the Holdings statement form. Please refer to section 321.4.3 for a detailed explanation of the fields on this form.
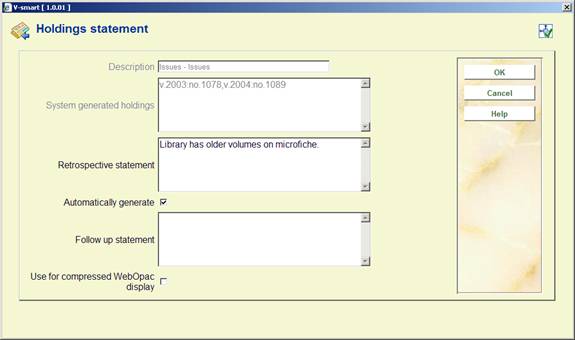
Notice the holdings statement that the system has automatically generated for this location. It also shows gaps for issues that are not yet received.
Such a statement would display in the WebOpac similar to this:

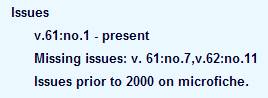
If you turn off the Automatically generate holdings flag, the system displays only what you put into the Retrospective statement and Follow up statement fields. You might prefer to list this subscription's holdings as follows:
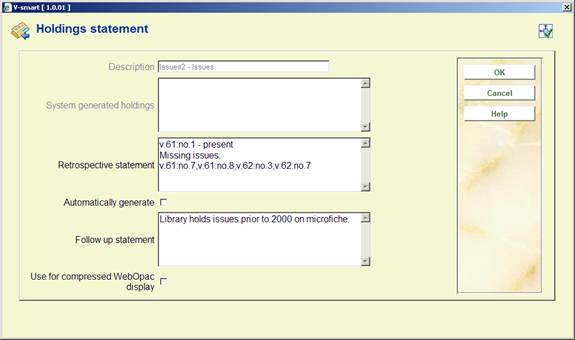
The resulting WebOpac display would be similar to this:
· Document control - Change History
|
Version |
Date |
Change description |
Author |
||
|
1.0 |
July 2008 |
creation |
|
||
|
1.1 |
August 2008 |
new option for WebOpac display; new option for (non)circulating issues |
|
||
|
2.0 |
January 2009 |
new option for label printing for issues; additional info on statuses |
|
||
|
3.0 |
August 2009 |
free text allowed for chronology; display frequency notes on receiving screen; new option binding alerts |
|
||
|
4.0 |
June 2010 |
new automatic barcode feature; clear loan status button; improvements for issue status codes; [ bracket for item barcode |
|
||